For those of you who have been following my celiac story, you know that there have been quite a few bumps in the road. Having to go 100% gluten and lactose free was hard enough, and then in December, realizing something else was wrong was a hard pill to swallow.
Through a series of eliminations, I realized that corn was also an issue, and I've been corn free for about a month now. I'm in the process of eliminating soy as well, which was a blow, seeing as how we live in the soy capital of the world.
So when I come across little triumphs, they are taken with a lot of celebration!
As I was researching gluten/Celiac/symptoms all those months ago, I had read from many sources that lactose intolerance was often a byproduct of untreated Celiac Disease.
BUT
Those same sources said that (UNLIKE GLUTEN) some Celiacs may regain the ability to tolerate lactose after letting their bodies heal for a while. For some, it was within months. For others, it took decades. (And for many, lactose was out for the rest of their lives.) Being the ever-positive (or, should I say, blissfully naive??) person that I am, I was hopeful that this would be something that would get better.
The lactose intolerance didn't have nearly the same side effects as if I were to consume gluten, but it was still uncomfortable. And if I wasn't able to easily tolerate it, I wasn't going to put myself through consuming it on a regular basis. But I figured that if I didn't occasionally check, I'd never know if I had regained the ability to digest it.
So every month or so, I'd try just a little bit. Maybe a small spread of cream cheese, or a shot glass of milk. Some hard cheese or some feta sprinkled on a salad. And every time, I'd pay for it. So I cut it back and figured I'd check once a quarter. Just a little bit, to see.
A few weeks ago we went to Sendai for a few days. We always start off road trips with a stop at Starbucks, but I can no longer have soy lattes. I hadn't tested lactose in several months and decided that I could use a little good news, just in case. And good news, I received! I ordered the smallest size (for those of you in the states, the Japanese have a size smaller than a tall -- called a short.) I tolerated it well, and even got one again the next day with no side effects!
Now, this doesn't mean that I'm going to start eating and drinking lactose-filled dairy products every day. But a little bit now and then is such a wonderful triumph with all the bad news I've had in the past several months!
So to celebrate, I made one of my all-time favorites: Greek Tzatziki sauce. This little condiment goes beautifully with meats (especially pork and lamb), on a burger, with fries, or even as a pizza dipping sauce!
Tzatziki Sauce (Yields about 2 cups)
12 oz (1.5 cups) Greek Yogurt
1 large cucumber, or 1.5 small ones
1 tsp pressed garlic (or 1 clove)
2 tsp chopped dill (fresh or dried)
1 tbsp fresh lemon juice
1/2 tsp salt
1/8 tsp white pepper
1. Slice cucumber(s) down the middle. Gently drag a soon (facing down) along the inside of the cucumber to remove most of the seeds. Then, chop the cucumber into small pieces, discarding the seeds. (The seedy insides carry moisture, which will make your tzatziki sauce runny.)
2. Place the cucumber pieces on a large paper towel, and pat dry. Leave the pieces on the paper towel for a few minutes to let it absorb excess moisture.
3. Measure all the other ingredients and add them to a food processor or blender. Add the cucumber pieces.
4. Process until smooth (I usually blend for about 30 seconds.)
5. Taste the sauce and add more salt or dill if needed. (I'm a sucker for dill, so I usually add a bit more lemon juice, garlic, and dill to mine, but it's your call!)
6. Place in the fridge for at least a half hour before serving. This allows the ingredients to thicken a bit and to "rest," thus enhancing the flavor. I usually make the sauce the night before I plan to use it.
The recipe is pretty quick and easy, and makes a great addition to many meals! Enjoy!
Showing posts with label lactose free. Show all posts
Showing posts with label lactose free. Show all posts
Thursday, April 25, 2013
Sunday, November 25, 2012
a gluten-free thanksgiving
Thanksgiving was a hit!
I will admit, I was worried.
Thanksgiving is my favorite day of the year and I was already feeling a bit blue about the whole thing, knowing that we'd (again) be spending it away from family. So messing up my first gluten-free Thanksgiving meal was not (do you hear me? NOT) an option!
Luckily, my fretting was in vain, because it was the best Thanksgiving dinner we've had since moving away and having to learn how to cook it all myself.
On the menu:
Turkey, of course! We roasted a lovely free-range turkey, stuffed with various fruits and vegetables. It was the most moist turkey we've had in a while.
Stuffing! My mom's favorite stuffing has all the best stuff. It's got celery and carrots. It's got onions and spices. It's got pancetta (which we found for the first time since we have lived here! Someone's looking out for us!!) and Italian sausage.
The tricky part was going to be the bread. I have been trying to bake a perfect loaf of bread since I was diagnosed as a Celiac in June...and it hadn't happened yet. I've made runny bread. I've made grainy bread. I've made perfectly cooked bread that tasted like cardboard (in fact, I would have preferred the cardboard).
Luckily, I discovered Jules gluten free flour, just in time. My first loaf of her bread was so good that I thought about NOT making stuffing so I could use the bread to make a peanut butter and jelly sandwich. Yes, I'll admit that's a bit crazy, but I haven't had a piece of GOOD bread since June! I held out, though, and the stuffing turned out to be A-MAZ-ING.
Green Bean Casserole... Some of you already know the torment that cream of mushroom soup has brought upon me this month. Luckily, I had worked out how to make it already and was able to whip up my homemade-from-scratch cream of mushroom soup for the casserole. Then, I used a recipe from another gluten free friend for the casserole itself. It was the best green bean casserole I have ever tasted! It didn't have that fake-tasting onion topping. Instead, it had real grilled onions with gluten free coating. (The recipe is at the bottom of this post if you want it! You can do whether you're sticking to an allergen-friendly diet or not...it was that good.)
Mashed Potatoes. Thanksgiving isn't complete without mashed potatoes. There was really nothin' special about them; just plain ol' mashed potato-y goodness.
Cranberry Sauce! This year I made orange cinnamon cranberry sauce. It was surprisingly easy to make and it was fabulous. I usually don't like cranberry sauce, but I enjoyed this one. (The recipe is at the bottom.)
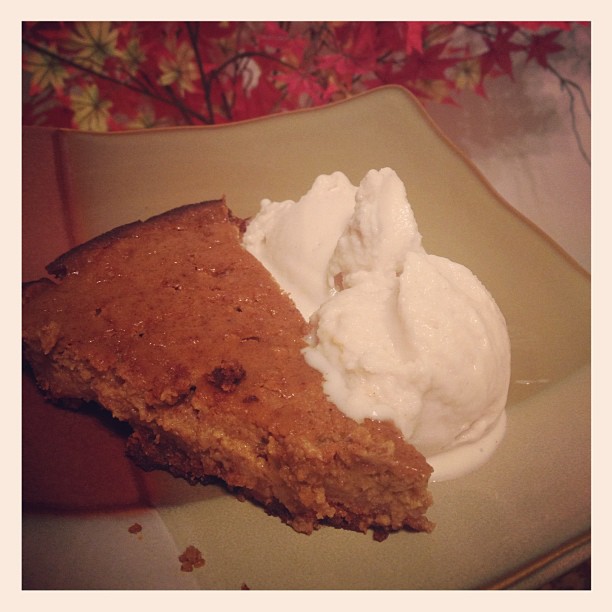
Pumpkin Pie and Gingersnap Ice Cream... Last week, I made homemade graham crackers for a Saturday-night-bonfire. They were great for s'mores and I used the leftovers for my pie crust. Delicious! I also saved a bit of my graham cracker/gingersnap dough to use for some ice cream to go with the pie! I used my typical vanilla ice cream recipe (recipe below) and added pumpkin pie spice to give it a nice flavor. Then, as it was churning, I added ribbons of the gingersnap dough. Oh goodness, the pie and ice cream together were a bit of Thanksgiving heaven!
So, we made it through our first gluten-free Thanksgiving, and will reap the benefits of not having to cook for the next several days!


RECIPES:
Green Bean Casserole, courtesy of Angela Glunt, my Thanksgiving hero!
**I substituted some Oikos greek yogurt in place of the sour cream since I have issues with lactose. I also used lactose free Kraft Mozzarella and vegan buttery spread instead of real butter.**
Casserole Ingredients:
Cranberry Orange Sauce, Courtesy of the Food Network
Ingredients
Vegan Vanilla Ice Cream (Note: I use an ice cream maker for this recipe!)
Ingredients
I will admit, I was worried.
Thanksgiving is my favorite day of the year and I was already feeling a bit blue about the whole thing, knowing that we'd (again) be spending it away from family. So messing up my first gluten-free Thanksgiving meal was not (do you hear me? NOT) an option!
Luckily, my fretting was in vain, because it was the best Thanksgiving dinner we've had since moving away and having to learn how to cook it all myself.
On the menu:
Turkey, of course! We roasted a lovely free-range turkey, stuffed with various fruits and vegetables. It was the most moist turkey we've had in a while.
Stuffing! My mom's favorite stuffing has all the best stuff. It's got celery and carrots. It's got onions and spices. It's got pancetta (which we found for the first time since we have lived here! Someone's looking out for us!!) and Italian sausage.
The tricky part was going to be the bread. I have been trying to bake a perfect loaf of bread since I was diagnosed as a Celiac in June...and it hadn't happened yet. I've made runny bread. I've made grainy bread. I've made perfectly cooked bread that tasted like cardboard (in fact, I would have preferred the cardboard).
Luckily, I discovered Jules gluten free flour, just in time. My first loaf of her bread was so good that I thought about NOT making stuffing so I could use the bread to make a peanut butter and jelly sandwich. Yes, I'll admit that's a bit crazy, but I haven't had a piece of GOOD bread since June! I held out, though, and the stuffing turned out to be A-MAZ-ING.
Green Bean Casserole... Some of you already know the torment that cream of mushroom soup has brought upon me this month. Luckily, I had worked out how to make it already and was able to whip up my homemade-from-scratch cream of mushroom soup for the casserole. Then, I used a recipe from another gluten free friend for the casserole itself. It was the best green bean casserole I have ever tasted! It didn't have that fake-tasting onion topping. Instead, it had real grilled onions with gluten free coating. (The recipe is at the bottom of this post if you want it! You can do whether you're sticking to an allergen-friendly diet or not...it was that good.)
Mashed Potatoes. Thanksgiving isn't complete without mashed potatoes. There was really nothin' special about them; just plain ol' mashed potato-y goodness.
Cranberry Sauce! This year I made orange cinnamon cranberry sauce. It was surprisingly easy to make and it was fabulous. I usually don't like cranberry sauce, but I enjoyed this one. (The recipe is at the bottom.)
Pumpkin Pie and Gingersnap Ice Cream... Last week, I made homemade graham crackers for a Saturday-night-bonfire. They were great for s'mores and I used the leftovers for my pie crust. Delicious! I also saved a bit of my graham cracker/gingersnap dough to use for some ice cream to go with the pie! I used my typical vanilla ice cream recipe (recipe below) and added pumpkin pie spice to give it a nice flavor. Then, as it was churning, I added ribbons of the gingersnap dough. Oh goodness, the pie and ice cream together were a bit of Thanksgiving heaven!
So, we made it through our first gluten-free Thanksgiving, and will reap the benefits of not having to cook for the next several days!

RECIPES:
Green Bean Casserole, courtesy of Angela Glunt, my Thanksgiving hero!
**I substituted some Oikos greek yogurt in place of the sour cream since I have issues with lactose. I also used lactose free Kraft Mozzarella and vegan buttery spread instead of real butter.**
Casserole Ingredients:
1 large bag of frozen green beans. (NEVER used canned!)
1 C. of Sour Cream
10 oz. Shredded Mozzarella Cheese (divided)
Morton Brand: Nature's Seasons to taste
1 Med. yellow onion, chopped and sauté in butter
3-4 fresh Garlic cloves or 1 Tab canned, minced and sauté with onions
4 oz jar of pimientos with liquid
Topping Ingredients:
3-4 cups Corn or Rice Chex cereal. (I used corn and it was really good, not too overpowering.)
3 or 4 stalks Green Onions chopped
Garlic Salt with Parsley-to taste
Onion Powder- to taste
*Blend cereal and seasonings in food processor until well chopped then add onions last and pulse until blended.
Directions:
*Mix all ingredients in large bowl until everything is well coated. Put mixture into large greased casserole dish and top with remaining cheese. Bake at 365 for 30 minutes, then add Topping and continue to bake for additional 10-15 minutes.
Ingredients
- 2 (8-ounce) packages cranberries, fresh or frozen
- 1 orange, zest cut into strips and juiced
- 1/2 cup sugar
- 1 cinnamon stick
Put all the ingredients into a saucepan over medium heat and simmer until the cranberries burst and the sauce thickens, about 15 to 20 minutes. Serve at room temperature or cool and refrigerate. Remove the cinnamon stick before serving.
Vegan Vanilla Ice Cream (Note: I use an ice cream maker for this recipe!)
Ingredients
- 14 oz. coconut milk (I use Goya - it's certified gluten free)
- 1 cup almond milk or soy milk
- 2 tablespoons + 2 teaspoons canola oil
- 2/3 cup agave nectar
- 1/8 teaspoon salt
- 3/4 teaspoon xanthan gum
- Seeds of one vanilla bean (or 1 teaspoon vanilla extract)
Directions
- Chill coconut milk and almond milk for at least a half hour prior to making. (Also, make sure you have your ice cream maker prepped.)
- Mix all of your ingredients in a blender and pour it into your ice cream maker.
- It takes about 20-25 minutes of churning, depending on your ice cream maker.
**If you want to add toppings, wait until ice cream is about 2/3 of the way through the churning process. Then slowly add toppings to ice cream maker.
Sunday, November 18, 2012
beef stroganoff, for the win! (a cream-of-mushroom-recipe)
For about three weeks, I have been craving stroganoff. Not anything fancy, just plain ol' cream of mushroom soup with ground beef and noodles (maybe some spices thrown in for good measure).
The problem is that our commissary doesn't carry any gluten free cream of mushroom soup. So online I went, only to find how difficult of a mission this would be. Not only do I need it to be gf, but it needs to be lactose free as well. I could find one or the other, but not both. Not anywhere.
So for three weeks, I have been craving in vain. Finally I decided I would just make it myself. It couldn't be that hard, right?
Oh, when will I learn?!
I found a lovely recipe for homemade cream of mushroom soup. The only drawback is that to make it, you have to have condensed milk.
Of course, our commissary does not have lactose free condensed milk. Lactose free milk? Yep. But not condensed.
So back to the interwebs I went, to search for a recipe to make condensed milk.
Why, oh why?!
Many of my searches for condensed milk used evaporated milk or milk powder as one of the ingredients. Really, internet? In this day and age, with all the allergen-friendly food recipes out there, there isn't an easier way??
After getting over my initialrage annoyance, I began looking at how-in-the-world one makes evaporated milk.
So I evaporated, and I condensed, and I creamed. FINALLY, I had some cream of mushroom soup to put in my stroganoff!
I was seriously worried at this point that it wouldn't taste like 'real' stroganoff and that the hours of torment and hard work were all for nothing.
Luckily, I was wrong! It was delicious, and now I will forever know how to make my own cream of mushroom soup completely from scratch.
I have put both recipes here, so if you have found this post on a frantic search for gluten free/lactose free cream of mushroom soup, you won't have to look any further!
Cream of Mushroom Soup
The problem is that our commissary doesn't carry any gluten free cream of mushroom soup. So online I went, only to find how difficult of a mission this would be. Not only do I need it to be gf, but it needs to be lactose free as well. I could find one or the other, but not both. Not anywhere.
So for three weeks, I have been craving in vain. Finally I decided I would just make it myself. It couldn't be that hard, right?
Oh, when will I learn?!
I found a lovely recipe for homemade cream of mushroom soup. The only drawback is that to make it, you have to have condensed milk.
Of course, our commissary does not have lactose free condensed milk. Lactose free milk? Yep. But not condensed.
So back to the interwebs I went, to search for a recipe to make condensed milk.
Why, oh why?!
Many of my searches for condensed milk used evaporated milk or milk powder as one of the ingredients. Really, internet? In this day and age, with all the allergen-friendly food recipes out there, there isn't an easier way??
After getting over my initial
So I evaporated, and I condensed, and I creamed. FINALLY, I had some cream of mushroom soup to put in my stroganoff!
I was seriously worried at this point that it wouldn't taste like 'real' stroganoff and that the hours of torment and hard work were all for nothing.
Luckily, I was wrong! It was delicious, and now I will forever know how to make my own cream of mushroom soup completely from scratch.
I have put both recipes here, so if you have found this post on a frantic search for gluten free/lactose free cream of mushroom soup, you won't have to look any further!
Cream of Mushroom Soup
Ingredients
- One small can of mushrooms (or a handful of fresh ones), rinsed and drained
- 2 tablespoons corn starch
- 1 tablespoon canola oil
- ⅛ teaspoon pepper
- ¼ teaspoon salt (or to your taste)
- 1 teaspoon onion powder
- ¼ teaspoon garlic powder
- Pinch of sugar
- 8 ounces condensed milk** (see below for substitution)
Instructions
- Using a blender or food processor, blend all of your ingredients. Pulse until mushrooms have reached the consistency you prefer. (I like them nice and small, so I tend to pulse longer than you might want to.)
- Pour into a 2-quart microwave-safe bowl and microwave for two minutes. Remove from microwave and stir. Then, microwave for another minute.
Condensed/Evaporated Milk (makes approx. 8 oz)
Ingredients
- 14-16 oz milk. This can be regular milk. I used Lactaid milk to cut out the lactose. I have not yet tried this with almond or soy milk, but probably will in the future.
Instructions
- Put milk in a saucepan on the stove and bring it to a simmer. The purpose of this is to reduce the water, thus making your milk thick and creamy. Make sure to keep the milk from boiling in order to keep it from curdling, and make sure it doesn't get scorched on the bottom of the pan.
- Continue simmering and stirring until milk has reduced by about half.
**Substitute**
If you are in a hurry, I have tried out this substitution and it's worked well. Instead of using condensed/evaporated milk, use 3/4 cup of milk and 3 tablespoons of softened butter instead. (Last time, I used 3/4 cup of almond milk + 3 tablespoons of vegan buttery spread and it worked like a dream.)
Sunday, August 19, 2012
summer desserts: parfait
One fun thing about having to go gluten and lactose free is forcing myself to experiment with new recipes. I do like cooking, though I often have to remind myself of that when the busy days get in the way.
It's been extremely warm here in the last week and I was craving something sweet and fruity. I found a recipe for berry parfaits that used granola and pudding. I already have granola on hand all the time (my Sunday ritual involves making granola for the week), but I haven't ever made pudding before.
I found a few recipes and messed around with them to ensure they are allergy friendly, and here's the final product! (Ensure your ingredients are gluten and lactose free.)
Ingredients:
- 3 tablespoons corn starch
- 1/3 cup sugar
- 1/4 cup cocoa powder
- 2 cups Lactaid milk (or unsweetened almond milk)
- 1/3 cup dairy-free chocolate chips
- 1/2 teaspoon vanilla
- 1/8 teaspoon salt
Prep:
- In a separate bowl, combine corn starch with 2 tablespoons of water. Mix until dissolved.
- In a small sauce pan, combine sugar, cocoa powder, and salt. Over low heat, gradually stir in the milk. Keep over low heat for around five minutes; do not let it boil.
- Remove pan from heat and stir in the chocolate chips. Continue stirring until chocolate chips are melted.
- Add corn starch mixture and vanilla to the sauce pan and cook over medium heat. Continue stirring. Cook until the mixture thickens (it will continue to thicken as it cools). Once it reaches the thickness you prefer, transfer the mixture into a large bowl. Place plastic wrap directly on the pudding surface to keep it from forming a thick skin.
- Let set for 20 minutes; then refrigerate for at least an hour before serving.
I will eventually write down how I've been making granola and post the recipe for that as well. (Let me know if you are wanting it now and I'll email you the general idea of how I've been making it.)
Once your pudding is chilled, put a spoonful at the bottom of a decorative glass. Make a layer of fruit over the top of it, and then a handful of granola. Continue to layer pudding, fruit, and granola until you reach the top of the glass. Place some fruit at the top to make it look pretty, and then have fun devouring it!

Subscribe to:
Posts (Atom)